
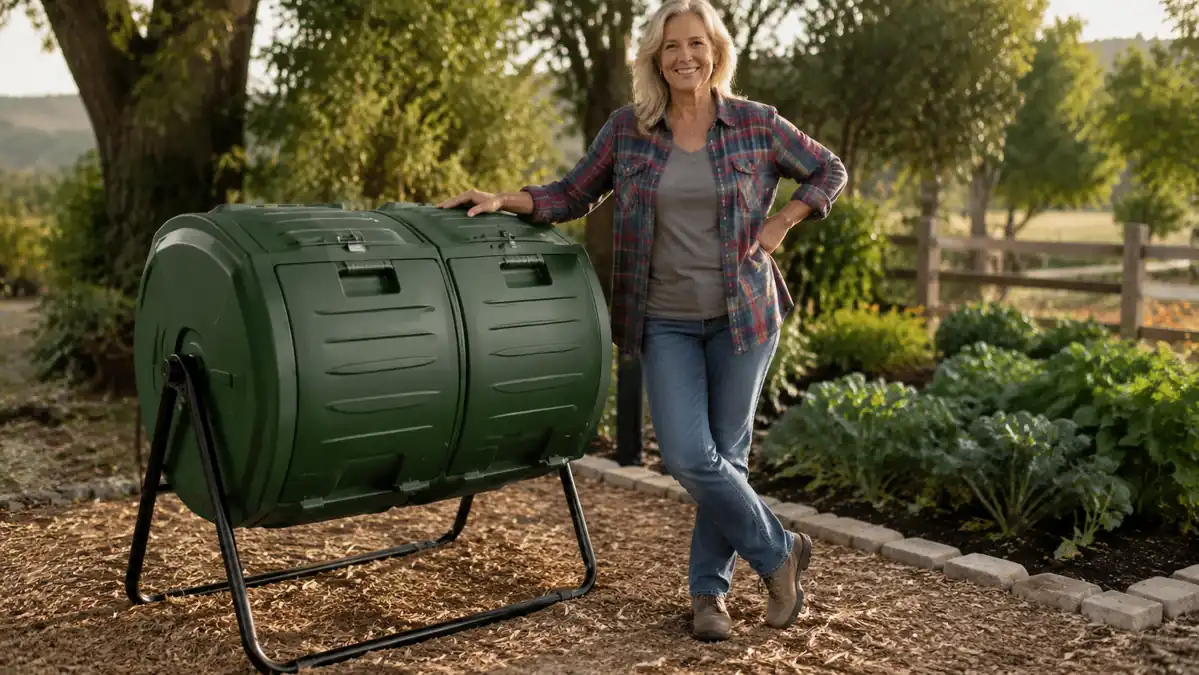
If you've never composted before, a compost tumbler is honestly the easiest way to start. It's a lot less fussy than the open pile my neighbor has been fighting with for years, and far less intimidating than the tumbler bin looks sitting in its box on your porch. I set up an F2C dual-chamber tumbler in my own backyard this spring after two failed attempts at an open bin. Raccoons got into the first one within a week, and the second turned into a wet, sour-smelling mess I gave up on by early summer.
This guide walks through exactly what I did to get that compost tumbler running properly from day one, in the order I'd do it again if I were starting over. There's no special equipment involved beyond the tumbler itself, a few basic ingredients you probably already have around the house, and a little patience while the first batch cooks. By the end you'll know where to put the bin, what to feed it, how often to turn it, and how to tell when your first batch of finished compost is actually ready to use in the garden.
Stop Guessing and Start With the Right Bin
A sealed dual-chamber tumbler takes most of the guesswork out of composting for a beginner. Check today's price and current availability on the F2C tumbler before you start collecting scraps in a bucket with nowhere to put them.
Amazon Check Today's Price on Amazon →Step 1: Pick the Right Spot for Your Compost Tumbler
Where you put the tumbler matters more than most beginners expect. You want a spot that gets at least a few hours of sun a day, since warmth speeds up decomposition, but you don't need full sun all day the way a raised vegetable bed does. I placed mine along the side fence, close enough to the back door that carrying scraps out doesn't feel like a chore, but far enough from the patio that I never notice it when it's actively cooking on a warm afternoon.
Level ground is worth checking before you bolt the steel frame together. My side yard has a slight slope, and I spent twenty minutes with a shovel evening out a patch before setup so the frame wouldn't rock every time I turned the drum. It's also smart to leave a couple feet of clearance on the door side of each chamber, since you'll be sliding the doors open and reaching in fairly often, and a tumbler jammed against a fence or shed wall gets old fast once you're using it daily.
Assembly on the F2C tumbler took me about forty minutes with a basic screwdriver, mostly bolting the steel A-frame together and setting the drum onto its end caps. Nothing about it requires special tools, but I'd recommend having a second set of hands for the ten minutes when you're lifting the loaded drum onto the frame legs. Once it's built, give the whole thing a push test before you load any material in, just to confirm the frame is stable and the drum spins freely on both end caps.
Step 2: Collect Your Greens and Browns
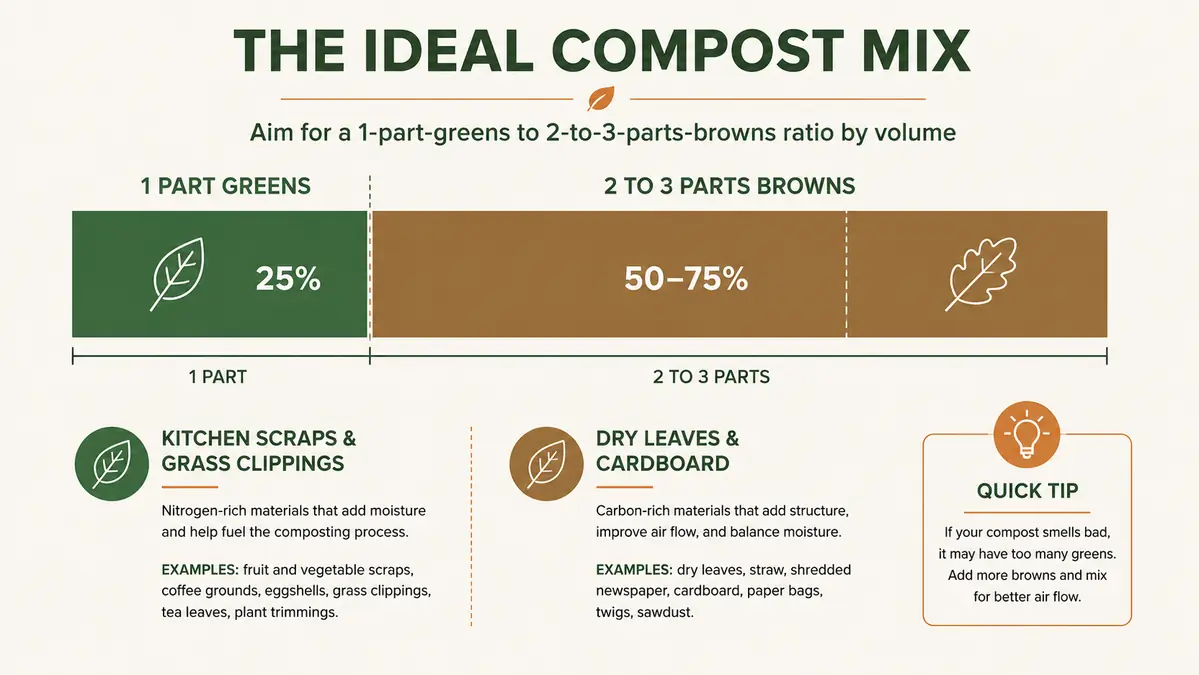
Every compost pile or bin runs on the same basic chemistry, a mix of nitrogen-rich "greens" and carbon-rich "browns." Greens are things like kitchen scraps, coffee grounds, fresh grass clippings, and vegetable peels. Browns are dry leaves, shredded cardboard, shredded newspaper, and straw. Before I ever opened the tumbler's chamber door for the first time, I spent about a week saving up material in two separate buckets so I'd have both on hand and wouldn't have to run one lopsided batch of pure kitchen scraps.
A rough starting ratio that worked for me is roughly one part greens to two or three parts browns by volume, not by weight. If that sounds backwards, it's because most beginners assume more food scraps means faster compost, and it's actually the opposite. Too many greens and not enough browns is the single most common reason a first tumbler batch turns slimy and starts to smell, which is exactly what happened in my old open pile before I switched over to a sealed bin.
Skip meat, dairy, oily foods, and pet waste, since those attract pests and smell terrible even in a sealed tumbler. Everything else from the kitchen, coffee grounds and filters, eggshells, fruit and vegetable trimmings, tea bags without the staples, is fair game. I keep a small covered bucket on the counter and empty it into the tumbler every two or three days rather than letting it sit long enough to smell in the kitchen and become a chore I put off.
One thing I wish someone had told me before that first week of collecting scraps: save up a bag of browns before you even start on greens. Dry leaves and shredded cardboard are easy to gather in a weekend and store in a garbage bag in the garage, but kitchen scraps pile up daily whether you're ready or not. Having a reserve of browns on hand from the start meant I never had to run a lopsided batch just because I ran out of dry material at the wrong moment.
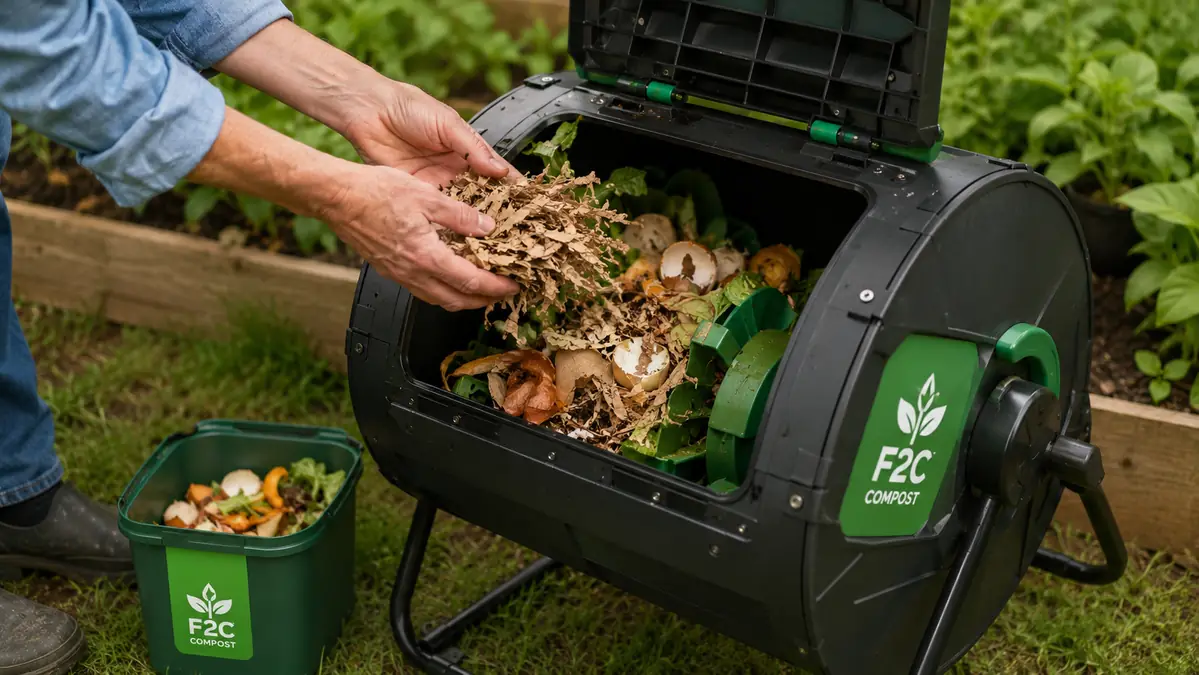
Step 3: Load the Chamber and Start Turning Your Compost Tumbler
For that first load, I alternated thin layers, a scoop of greens, then a handful of shredded cardboard, then greens again, roughly the way you'd build a lasagna. You don't need to be precise about it since the tumbler's rotation mixes everything as you turn it, but starting with layers instead of one big clump of wet scraps helps the whole batch break down more evenly from day one. I filled my first chamber about two thirds full to leave room for the material to tumble and mix rather than packing it edge to edge.
Once there's material inside, start turning the drum right away rather than waiting for a full load. On the F2C tumbler, I give each loaded chamber a handful of full rotations every two to three days, which takes under a minute when the chamber isn't packed to the top. Turning does two things: it mixes fresh material with material that's already partially broken down, and it works air into the pile, which the microbes doing the actual composting need to keep working efficiently.
It's tempting to keep tossing new scraps into a chamber that's already cooking, but that resets the clock on the whole batch and is a big reason first-time composters feel like their bin never finishes anything. Since this tumbler has two chambers, my routine is to fill and turn chamber one until it's mostly full, then switch to adding fresh scraps into chamber two while chamber one finishes undisturbed. That single habit made a bigger difference in how fast I got usable compost than anything else in this guide.
Step 4: Manage Moisture So the Batch Doesn't Sour
The material inside should feel about as damp as a wrung-out sponge, not dripping wet and not bone dry. Too wet and you get that sour, ammonia-like smell that drove me away from my old open pile in the first place. Too dry and decomposition basically stalls out, since the microbes doing the work need moisture to survive. I check moisture every time I turn the drum by grabbing a small handful through the sliding door and giving it a squeeze.
If it's too wet, which usually happens after I add a big batch of fresh grass clippings or a rainy stretch gets into the chamber through the vents, I mix in extra shredded cardboard or dry leaves to soak up the excess moisture. If it's too dry, which tends to show up during a hot, dry stretch in summer, I add a splash of water with a garden hose right into the open chamber before closing the door and turning it a few extra times to distribute it evenly. Neither fix takes more than a minute or two.
A sealed tumbler like this one is genuinely easier to manage on the moisture front than an open pile, since rain doesn't soak straight in and evaporation happens more slowly behind the closed doors. That's part of why I never got the sour smell in this setup that used to show up in my old wire bin after a wet week, and why I stopped worrying about odor complaints from the neighbors once I switched over.
Step 5: Know When It's Finished and Harvest Your First Batch
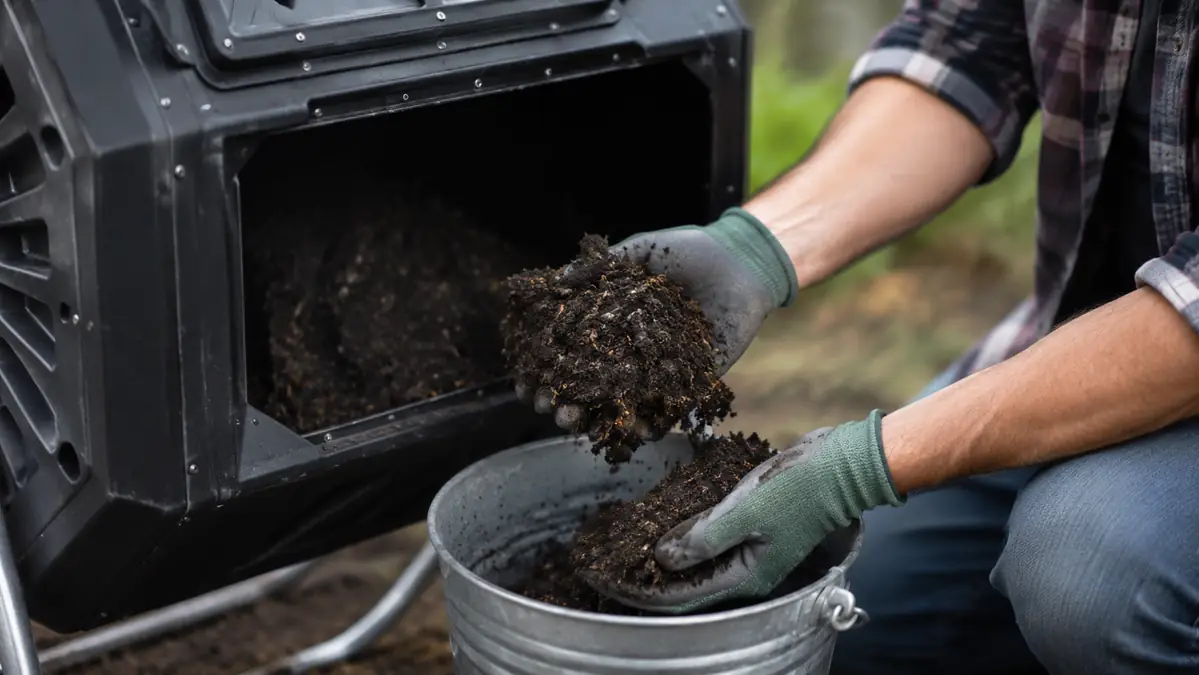
Finished compost looks and smells nothing like what you put in. You're looking for a dark, crumbly texture, closer to rich soil than to recognizable food scraps, with an earthy smell rather than a food smell. Depending on the season, temperature, and how consistently you turned the drum, my first batch took about eight weeks in early spring, which was slower than I'd hoped but not unusual for a first attempt while I was still figuring out the ratio.
When a chamber looks ready, stop adding new material to it and let it sit for a final week or two without fresh scraps going in, turning it every few days as usual. This lets whatever's still breaking down finish up without new, undigested material mixed through it. Slide the door open, scoop out what looks and smells finished, and if you find a few chunky bits of cardboard or a stubborn eggshell that hasn't broken down yet, toss them back into your next batch instead of the trash.
My first harvest was only a few gallons, enough to top-dress one raised bed and work into the soil around a couple of tomato plants. It's a small payoff for eight weeks of saving scraps and turning a drum, but it's compost you know the exact ingredients of, and every batch after the first one gets faster once you've dialed in your own ratio and routine for the seasons ahead.
What Else Helps
A few small habits made the whole process easier once I got past that first batch. Chopping up larger scraps like melon rinds or corn cobs before they go into the tumbler speeds up how fast they break down, since smaller pieces have more surface area for the microbes to work on. Keeping a bag of shredded cardboard or dry leaves stashed near the tumbler means you always have browns on hand when a big batch of greens shows up, instead of scrambling to balance a lopsided load. And writing the date you started each chamber on a piece of tape stuck to the frame is a small thing that saved me from guessing how long a batch had been cooking more than once.
If your first batch is moving slower than you expected, don't panic and don't assume the bin is broken. The most common culprits are a ratio that's too heavy on wet greens, a chamber that's too dry from a stretch of hot weather, or simply cold nights slowing everything down the way they do with any composting method, tumbler or pile. Check the ratio and the moisture first before you assume something's actually wrong, and give it another week or two before you decide a batch needs to be reworked.
The compost tumbler didn't make composting effortless. It made it possible for someone who'd already failed at it twice.
Ready to Turn Scraps Into Something Useful?
If you're starting from zero, a sealed dual-chamber tumbler bin like the F2C is the easiest way to avoid the smell, pests, and slow finish that come with an open pile. Check current pricing and availability on Amazon before your kitchen scrap bucket fills up again.
Amazon Check Today's Price on Amazon →